
First to first - very important is day time and weather when you want take your photos. Best day for you photo shoots is gray, cloudy day, when you have flat light every where and no shadows.
This is mainly important for vegetation textures as trees bush and of course buildings. Because you never had hard, dark shadows and what is important blue (or sometime magenta) aureole around you textures. It will avoid so much hard work after in post processing and save you time.
Next important thing is composition of yours photos, especially when you must take your buildings photos in narrow street and don't have good distance from buildings or others objects. You always will have lens distortion and perspective distortion. Last it's not very critical if you will take right way to do that. In short distance you cant avoid that. But must keep in mind that perspective in one direction, finally, makes you photo less twice! Look in picture.

Blue line show, what is final size of your texture. Never try smallest sides made bigger, it will distort resolution otherwise one texture side will perfect, other terrible. Always must biggest size made smaller. So always (when is possible) try make your photos with one direction perspective. And will have bigger textures as possible.
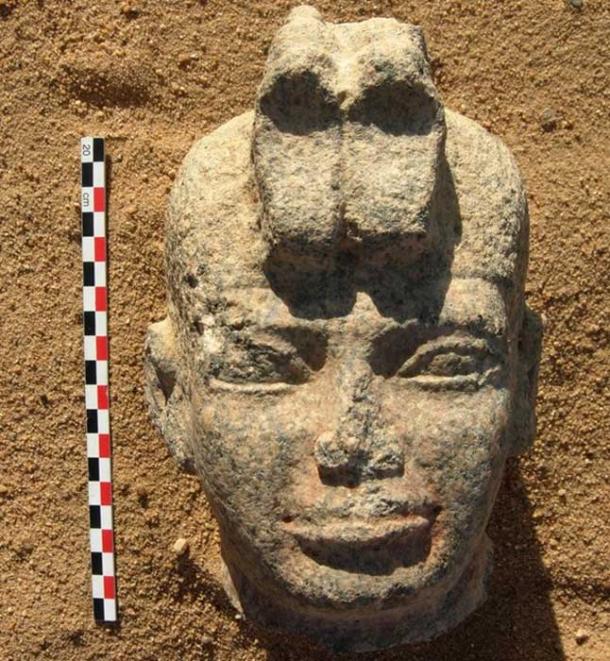
If you want to avoid scaling issues during the modeling process, I recommend using a wooden stick as a reference ruler. Place it next to your object and take photos. This way, you'll always have an accurate measurement of your objects (refer to the first picture), since you already know the length of your wooden stick. It's best to use a 2-meter stick with a 1-meter mark in the middle. You can attach a nail to one end of the stick, allowing you to easily drive it into the ground so it stands upright without needing to hold it.
Use nearby objects with known dimensions to estimate the size of other objects in the distance. For example, if I know the standard size of a road sign near a house, I can use that information to roughly calculate the house's dimensions. While it won’t be perfectly accurate, it will provide a reasonable approximation. You can also find typical scale measurements online based on legal regulations, such as the standard sizes of street signs, electric light poles, utility poles near roads, and more...
Vegetation
he time of day is an important factor. As mentioned before, the best conditions are on a cloudy day. At first glance, a sunny, cloudless day might seem ideal, but if you want to save time adjusting textures later, it's better to avoid direct sunlight.
Another key point is finding a 'clear area' for your shots. Position yourself so that there are no distracting elements—like trees—behind your subject, as this will make the cut-out process in photo editing much faster.
Lastly, try to select trees or objects that don't have distinctive features. Unique features tend to stand out, making them easily recognizable. When encountering them again, you might instinctively think, 'Oh, I've seen this before.' This creates a sense of repetition, so it's best to avoid such objects when aiming for a more natural and seamless effect.


In Photoshop you can select an object, then go to Select > Modify > Border > Width 2 (3)
After you can choose what to do or use some green brush with Darken blending mode, to overpaint problematic places. Or just use Adjustments Hue/Saturation and tweak the colors...

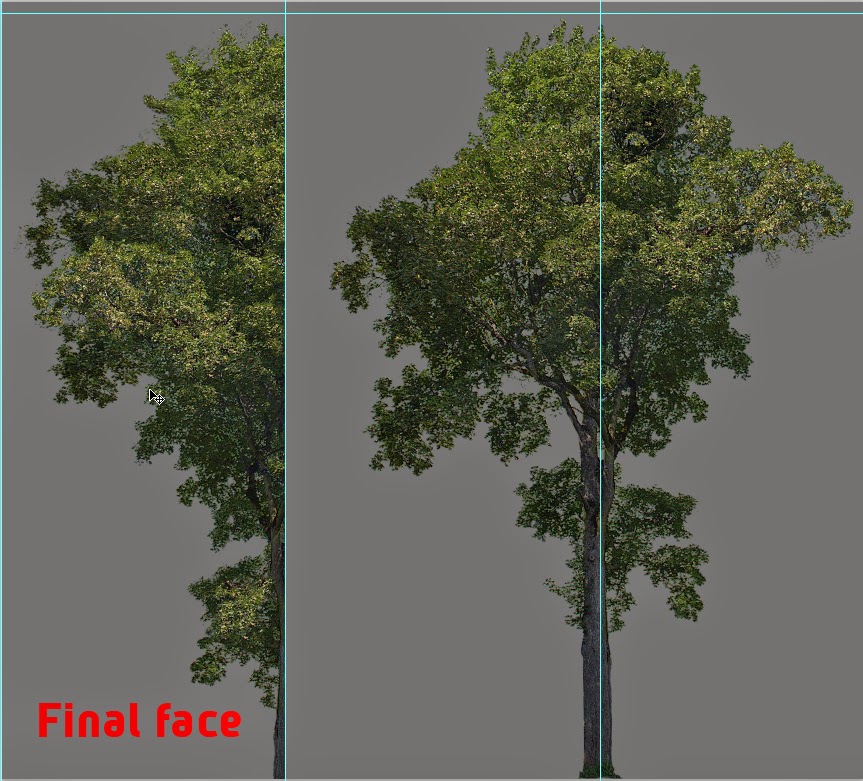
Now about textures for vegetation. "Low poly" tree model must have 3 faces, so its required three different face of your trees or grass models. If you used 2 crossed between you never avoid "mirror effect" in you final textured model and usually its not good. You always need mask its from camera, take lot time in future... What I should do? Faster way - is after you finish cut out main tree, just copy all sides in others two layers (in your photo editor. I used Photoshop, but possible it did in others free programs: Gimp, Krita and so on).
Used all new layers in same direction, and just change height and width with transform tool. In same place, you must delete some parts, in some add new details (with stamp tool). Then compare new tree faces with original and tweek new if found mirrored places on them... In right and left direction used the same method.

Finally all looks like this and you have 3 different faces for your vegetation model. Yes some time you can make few photos from different, real tree, direction, but you always need cut out it. This required addition time, so its not good if you don't have it enough.

In new file make simple triangle and define it as new brush. In later picture you can see how prepare it to work. Easy and very effective.

Some times, you need to have nice and original grass or small bush photo, so this scheme will let you have good photo from place. It's easy and flexible in use and you can take it when walking...

These days and when you have better 3D skills, it is not necessary to use real references to create vegetation models. You can use additional addons (like Tree generator, Grow, etc.) or external programs like Speed tree, Onix, PlantCatalog, etc., to create the necessary models yourself. Yes, it will take time to learn, but it is also a fun time that will be valuable after. Or you can buy ready-made assets like RallyG - Assets packs on the Discord server: https://discord.gg/FQFUqxyQ
Sorry my English is poor, but I hope these tips will helpful any way...
No comments:
Post a Comment